Home > Getting Started
Whether you’re new to BInspec or just need a quick refresher, this guide will walk you through the entire process—from signing up to submitting professional reports. Let’s get started.
Step 1: Sign Up and Start Your Free Trial
Getting started is quick and easy.
Tip: Refer a friend and get 1 month free when they sign up
Step 2: Create a New Report
Once you’re logged in:
Tap “New Report” on your dashboard.
Choose the type of report you want to create.
Give your report a title (eg: Personell Report).
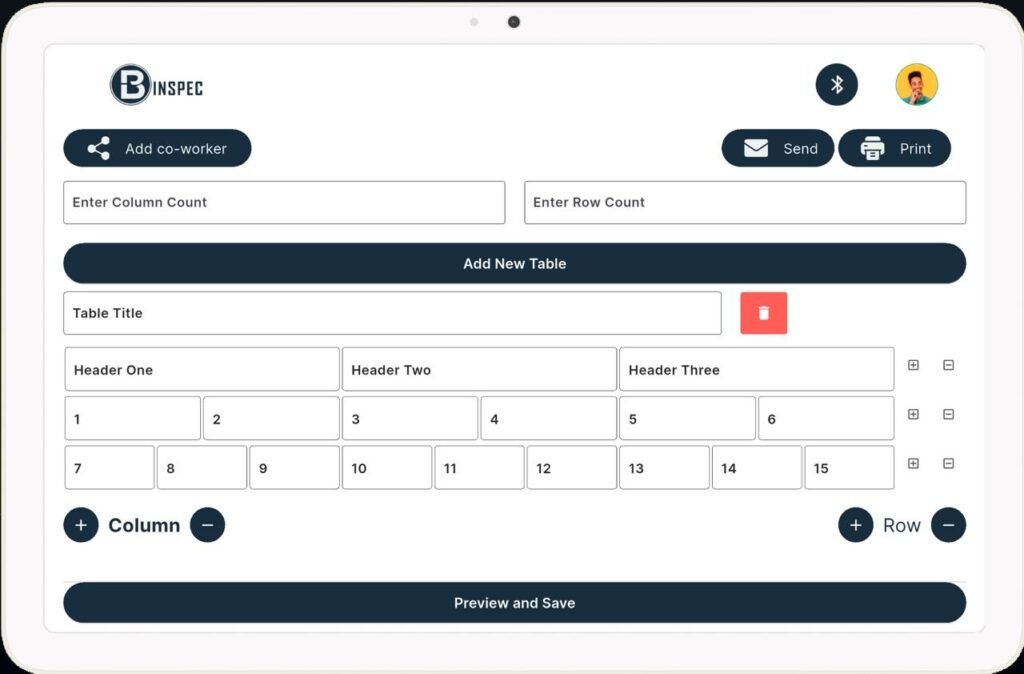
Step 3: Build Your Dynamic Report
Step 4: Collaborate in Real-Time
Working with a team? BInspec makes it easy to collaborate.
Open the report you want to share.
Tap “Collaborate” and invite your colleague via email.
They’ll get instant access to view or edit the report (based on the permissions you set)
All updates are synced live, so you’re always working on the most up-to-date version.
Step 5: Add Observations
Once your layout is set:
Step 6: Preview and Edit Your Report
Tap “Preview” to see your report in its final format.
Check for typos, missing details, or add last-minute photos.
Make edits with one tap—everything updates instantly.
Step 7: Download or Share
Once you’re happy with the report:
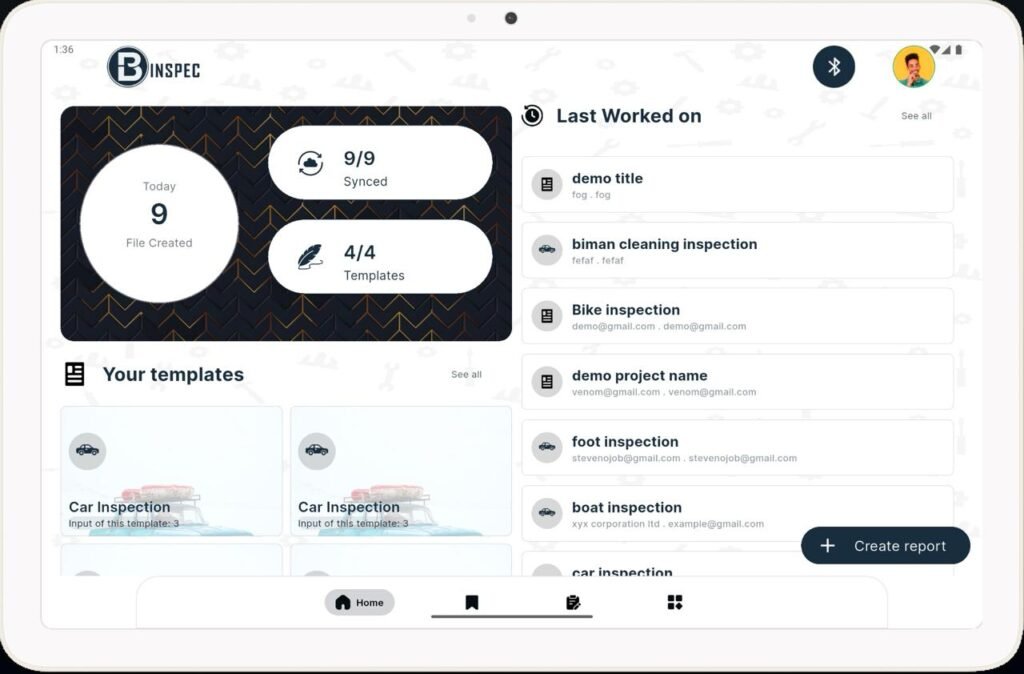
Step 8: Manage Reports in Your Dashboard
Easily keep track of your work.
Search by address, client name, or date.
Archive old reports for later reference.
Duplicate past reports to save time on similar jobs.
Ready to Dive Deeper?
BInspec gives you full flexibility and control over your layout.